Your kitchen sink drain handles everything from pasta water to coffee grounds. It’s the hardest-working exit in your home — and the first place odors start when grease, soap scum, and food residue build up. The result? Slow draining, gurgling, and that “what is that smell?” moment no one wants.
The good news: you don’t need harsh chemicals or a plumber for routine care. With the right steps (and a few cheap supplies), you can clean, deodorize, and keep the drain flowing fast without damaging pipes, finishes, or disposals.
Key Takeaways
- Treat the drain like a system: strainer → tailpiece → P-trap → line. Clean from top to bottom.
- Start gentle: boiling water, dish soap, and a brush clear most biofilm.
- Use baking soda + hot water for deodorizing; add vinegar only if your sink and counter materials can handle splashes (keep acids off natural stone).
- For garbage disposals, ice + coarse salt, then citrus peels (small amount) and a brush under the splash guard work wonders.
- Skip harsh drain chemicals. Prefer enzymatic cleaners for organic buildup and a plunger for simple clogs.
- Prevent problems with strainers, no grease down the drain, and a weekly hot-flush routine.
What kind of drain do you have (and why it matters)?
Not all kitchen drains are the same. Knowing yours helps you pick the safest cleaning method.
- Standard sink (no disposal): Food traps at the strainer, tailpiece, and P-trap. Gentle mechanical cleaning + hot water flushes solve most issues.
- Sink with garbage disposal: Odors often live under the splash guard and inside the grind chamber. You’ll add disposal-safe steps (brush, ice/salt, citrus).
- Farmhouse or apron-front sink: Same internals, but watch splashes against natural stone counters when using acids (vinegar, lemon).
- Septic system homes: Avoid frequent harsh chemicals. Use enzymes and mechanical methods to protect the tank’s bacteria.
What supplies should you keep under the sink?
You don’t need much. This simple kit handles 90% of jobs:
- Microfiber cloths and a non-scratch sponge
- Bottle/pipe brush (long, flexible) and a small stiff brush for the splash guard
- Dish soap and baking soda
- White vinegar (use carefully around natural stone)
- Coarse salt (kosher/rock) and ice for disposals
- Rubber gloves and old toothbrush
- Kettle or pot for boiling water
- Enzymatic drain cleaner (monthly maintenance)
- Optional: cup plunger (flat bottom) and bucket for P-trap cleaning
How do you do a quick daily freshen-up (60 seconds)?
A fast habit keeps odors away.
- Hot rinse: Run the hottest tap water for 20–30 seconds after greasy or starchy rinses.
- Soap swipe: Add a dot of dish soap into the drain; run warm water to coat the tailpiece.
- Strainer check: Empty the basket/strainer into the trash or compost — not the drain.
- Dry lip: Wipe the visible drain ring and sink lip to stop grime rings.
Small routine, big payoff.
What’s the safest weekly cleaning routine for most drains?
Once a week, give the drain a quick reset:
- Boiling water flush: Slowly pour a kettle of boiling water down the drain to melt congealed fats and loosen soap film.
- Baking soda boost: Add ½ cup baking soda. Wait 5 minutes.
- Hot water chase: Follow with another pot of very hot water to carry the soda through the trap.
- Brush the throat: Use a bottle brush to scrub the first 6–8 inches of the drain opening and underside of the strainer where slime forms.
Tip: If your countertop is marble or granite, skip splashing vinegar here — acids can etch stone if they contact the surface. Use baking soda + hot water only, or protect the counter carefully before any acidic step.
When should you use baking soda + vinegar (and when not to)?
Baking soda (alkaline) and vinegar (acid) foam and mechanically loosen light slime. They won’t dissolve deep clogs, but they’re good for odor and minor sludge.
Use for: plastic/metal drains with laminate, tile, or solid-surface counters nearby.
Avoid splashes if your counter or sink is natural stone (marble, limestone, some granites). If you do use it:
- Pour ½ cup baking soda down the drain.
- Add 1 cup warm vinegar slowly; let foam 10–15 minutes.
- Flush with boiling water.
Keep the vinegar in the drain — not on the countertop.
How do you clean a garbage disposal so it actually smells clean?
Odors usually live on the splash guard (black rubber) and upper chamber walls, not just the blades.
- Safety first: Unplug the disposal or switch it off at the breaker.
- Clean the splash guard: Flip the rubber flaps up. Scrub under them with a small stiff brush and soapy water. Rinse.
- Brush the chamber: Use a long bottle brush with warm, soapy water. Rotate around the sides.
- Ice + salt scrub: Re-power. Add a tray of ice and ¼ cup coarse salt. Run the disposal with cold water for 10–15 seconds. This scours the impellers and loosened gunk.
- Citrus finish (optional): Grind a few small citrus peels for freshness. Avoid large loads of peels; oils can build up.
- Final flush: Run cold water for 30 seconds.
Pro tip: The splash guard is the #1 odor source. Clean it weekly and you’ll notice a huge difference.
How do you handle slow drains without harsh chemicals?
Work from least to most aggressive.
Step 1: Hot water + soap
- Fill the sink with very hot water, add a squeeze of dish soap, and pull the plug. The surge helps push soft buildup through.
Step 2: Plunge (cup plunger)
- Block the overflow if present, add enough water to cover the plunger cup, and plunge straight up and down 10–15 times.
- Avoid chemical drain cleaners before plunging — they can splash hazardous liquid.
Step 3: Enzymes (overnight)
- Use an enzymatic drain cleaner according to label, ideally overnight when the drain won’t be used. Enzymes digest organic slime (fats, starches) safely.
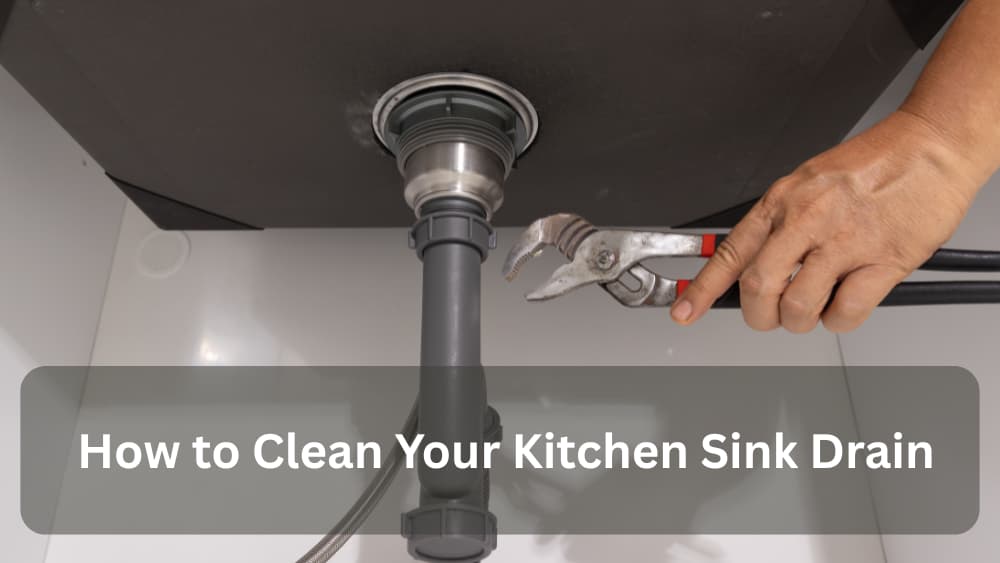
Step 4: Clean the P-trap (if comfortable)
- Place a bucket under the trap.
- Unscrew the slip nuts by hand or with adjustable pliers.
- Remove the P-trap; empty into the bucket.
- Scrub inside the trap with a bottle brush; reassemble with the washers seated properly.
- Run water and check for leaks.
If you’re not comfortable with the trap, stop at enzymes and call a pro for persistent slow drains — especially if multiple fixtures are slow (sign of a main line issue).
Are chemical drain cleaners ever a good idea?
For kitchen drains, they’re often not the best solution:
- They can damage older metal pipes or soften some plastics.
- They create splash hazards if you later plunge or open the trap.
- They don’t remove the biofilm that causes odor; they just punch a narrow channel.
If you must, use enzyme or bacterial cleaners instead. They’re safer for pipes and septic systems and support long-term odor control.
How do you remove that persistent drain odor?
Odors usually come from biofilm in the upper drain and splash areas, not deep in the line. Target these spots:
- Throat scrub: Work a bottle brush with soapy water around the drain throat and underside of the strainer or stopper. That slime harbors odor.
- Overflow (if present): Flush with hot water and a bit of dish soap using a turkey baster.
- Disposal splash guard: Clean weekly (it’s the odor king).
- Enzyme maintenance: Use monthly to keep the film from returning.
Finish with boiling water and a 30-second cold rinse (especially after disposal cleaning).
What should you never put down a kitchen drain?
- Grease, oils, and fats (including bacon fat and butter sauces). They solidify and coat pipes.
- Coffee grounds (they settle and clump).
- Fibrous peels (celery, corn husks, artichokes) — they wrap around disposal parts.
- Large amounts of flour or starch (forms gluey paste).
- Expandable foods (rice, pasta) — they swell and trap debris.
- Harsh solvents/paint (toxic and pipe-damaging).
Collect grease in a can or jar, let solidify, and trash it. Compost peels if your system allows.
How do you clean different drain finishes without damage?
- Stainless rings/strainers: Dish soap + microfiber; for water spots, brief vinegar followed by a clean water rinse and dry.
- Brass/bronze finishes: No acids. Use mild soap and water; dry immediately.
- Natural stone sinks/counters nearby: Avoid vinegar or lemon splashes. Stick to soap + hot water or protect the surface during acidic steps.
What’s a smart monthly maintenance plan?
Week 1: Hot flush + baking soda; brush the throat; clean the strainer.
Week 2: Disposal deep clean (splash guard, brush, ice + salt).
Week 3: Enzymatic cleaner overnight; no water during dwell.
Week 4: Visual check of connections; wipe cabinet floor (early leak detection).
Five minutes per week beats a Saturday with a wrench.
Troubleshooting: What if the sink still drains slowly?
- Multiple fixtures slow? Likely a branch or main line issue. Call a pro.
- Gurgling after draining? Venting problem; a plumber can evaluate.
- Recurring clogs in the same spot? Replace a deformed or improperly sloped section; cleaning will only be temporary.
- Persistent odor with clear pipes? Clean the overflow (if present) and disposal splash guard again; consider biofilm in the tailpiece — scrub deeper with a longer brush.
FAQs
Can I pour boiling water in any drain?
Boiling water is fine for metal and most modern PVC systems, but avoid it if your sink or counter materials are sensitive to heat or if your plumbing is very old (lead joints or questionable seals). Use just-off-boil hot water if unsure.
Does baking soda really unclog drains?
It’s great for odor and light film, but it won’t clear solid clogs by itself. Pair with hot water, enzymes, or a plunger.
Is bleach okay for the drain?
Bleach can kill odors temporarily but doesn’t remove biofilm and can damage finishes or septic bacteria. Prefer enzymes and mechanical cleaning.
How often should I clean the P-trap?
Only when slow drains or odors persist after routine cleaning. Most homes don’t need frequent trap removal if weekly habits are solid.
Can I use vinegar if I have marble counters?
Yes inside the drain only—but protect the counter and sink rim carefully. Any acid on marble can etch the surface.
Quick “Clean & Clear” Checklist
- Hot water flush after greasy or starchy rinses
- Weekly baking soda boost + brush the drain throat
- Monthly enzyme treatment (overnight)
- Disposal deep clean: splash guard, brush, ice + salt, brief citrus
- Never pour grease down the drain
- Plunge first, trap last; skip harsh chemicals
Final Thoughts
A clean kitchen sink drain isn’t about one big fix — it’s about small, smart habits. Start with heat and soap, add baking soda for freshness, keep acids controlled and off stone, and use enzymes to maintain flow. If you have a disposal, clean the splash guard and chamber regularly; that’s where most odors live.
Treat the drain like a system, and it will stay quiet, quick, and odor-free. A minute a day, a few minutes a week — and no more mystery smells.

As the chief content writer, Hassan Al Sarker works as a professional kitchen-based content creator at Kitchen Liker.
In addition to reviewing the content published on Kitchen Liker, he ensures that it is accurate, relevant, and helpful. As a result, all the reviews and information published at Kitchen Liker are neutral and userfriendly.
Hassan Al Sarker has a bachelor’s degree in Hotel and Tourism Management From the Newyork University. Before joining Kitchen Liker, he was a contributor at Kitchen Club, United States.