Is your faucet dripping or leaking, causing annoying sounds and wasting water? You don’t have to call a plumber or spend a fortune to fix it.
Replacing a faucet valve is easier than you think, and with the right steps, you can do it yourself quickly and confidently. In this guide, you’ll discover simple, clear instructions that anyone can follow. Keep reading, and by the end, you’ll have the skills to stop that leak and save both water and money!

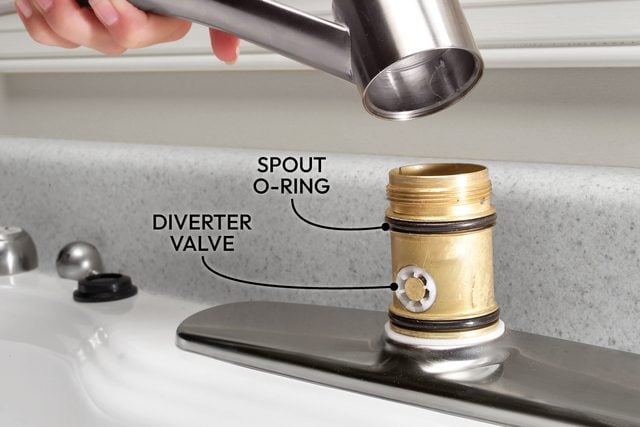
Credit: www.familyhandyman.com
Tools And Materials Needed
Replacing a faucet valve requires the right tools and materials. Having everything ready makes the job easier and faster. Gather all items before starting to avoid interruptions. Proper tools help prevent damage to your faucet and plumbing.
Essential Tools
A wrench set is a must for loosening and tightening nuts. An adjustable wrench works well for different sizes. A screwdriver, usually flathead or Phillips, helps remove screws. Plumber’s tape seals threaded connections to stop leaks. Needle-nose pliers are useful for gripping small parts. A bucket catches water that may spill during the work. A cloth or rag cleans up drips and dirt. A flashlight can help see inside dark spaces under the sink.
Replacement Parts
Buy the correct faucet valve model for your faucet brand. Check the valve size and type before purchasing. New washers and O-rings may also be needed. These small parts help stop leaks and ensure smooth operation. Having all replacement parts ready saves time. Keep them close at hand during the repair.
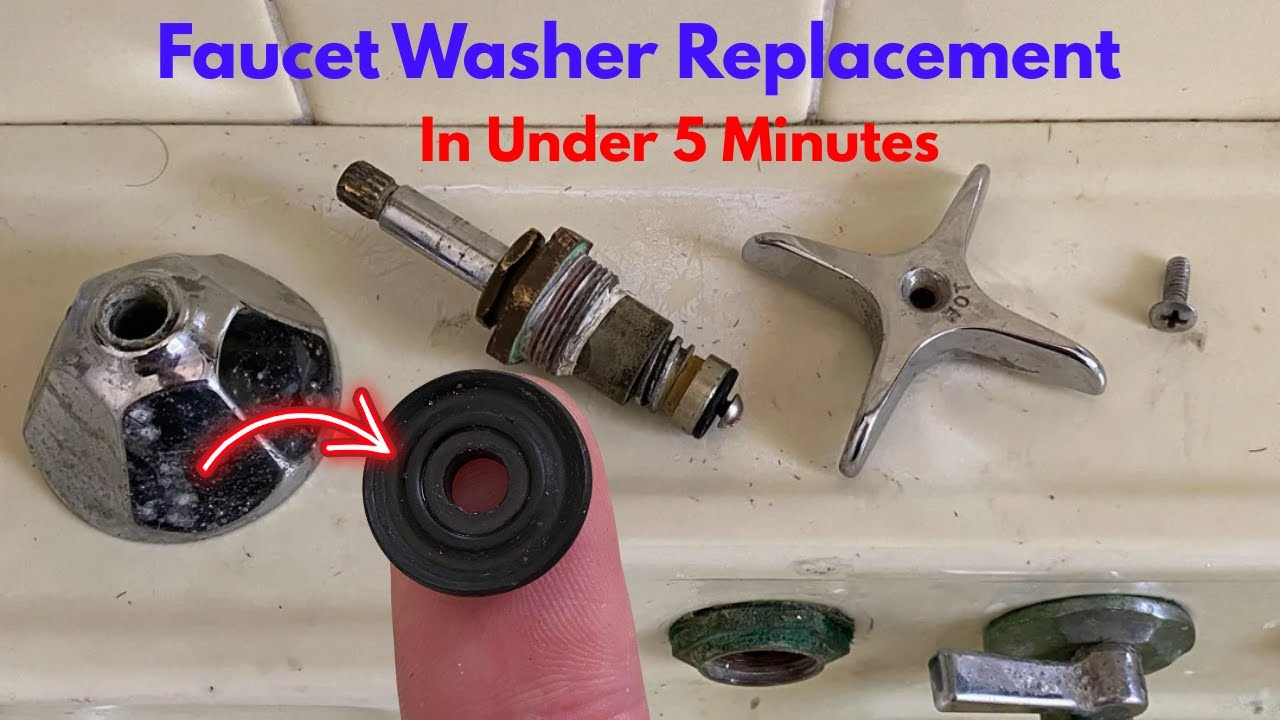
Credit: www.youtube.com
Preparing For Replacement
Preparing for faucet valve replacement is key to a smooth process. Proper preparation saves time and avoids water damage. Clear the area under the sink for easy access. Gather tools like a wrench, screwdriver, and a bucket. Wear gloves to protect your hands from dirt and sharp edges.
Shutting Off Water Supply
Locate the water shut-off valves under the sink. Turn the valves clockwise to close them. If no valves exist, shut off water at the main supply. Test by turning on the faucet. No water should flow if shut off correctly. This step prevents leaks during replacement.
Draining The Faucet
Open the faucet to release remaining water. Let water drain completely to avoid spills. Place a bucket under the pipes to catch drips. Use a towel to wipe wet areas. Draining reduces pressure in the pipes. It makes valve removal safer and cleaner.
Removing The Old Valve
Removing the old faucet valve is the first step in a smooth replacement process. This task requires care and the right tools. Taking your time helps avoid damage and ensures a better result. Follow each step closely to safely remove the valve.
Accessing The Valve
Start by turning off the water supply. This stops water from flowing while you work. Next, open the faucet to drain any water left in the pipes. Use a wrench to remove the faucet handle. This reveals the valve underneath. Clear any dirt or debris around the valve for easy access. Check the valve type to know what tools to use next.
Detaching Components
Loosen the valve nut with a wrench. Turn it counterclockwise until it comes off. Pull out the valve stem carefully. Some valves may need a screwdriver to remove screws. Keep all small parts in a safe place. Inspect the area for any signs of damage or wear. Clean the valve seat before installing a new valve. This prevents leaks and improves faucet function.
Installing The New Valve
Installing the new faucet valve is the next important step after removing the old one. This process ensures your faucet works well without leaks. Follow each step carefully for a proper fit and secure installation.
Positioning The Valve
Start by placing the new valve in the faucet body. Make sure it fits snugly and aligns with the water flow direction. Check if any washers or seals are in place. These parts help stop water leaks. Adjust the valve until it sits flat and even.
Securing The Valve
Use the appropriate tools to tighten the valve securely. Avoid over-tightening to prevent damage. Tighten screws or nuts evenly to keep the valve stable. Confirm the valve does not move or wiggle. This step stops water from escaping later.
Testing And Final Adjustments
After replacing the faucet valve, testing and making final adjustments is crucial. This step ensures your faucet works well without any leaks. Small issues caught early save time and water waste later.
Turning On Water Supply
Start by slowly turning on the main water supply. Open the faucet to let water flow through the new valve. Watch and listen for any unusual sounds or pressure changes. This helps to avoid sudden water bursts.
Checking For Leaks
Look closely around the valve and connections for water drops. Use a dry cloth to wipe and spot any damp areas. Tighten fittings gently if you find leaks. Repeat the check after a few minutes to confirm no water escapes.
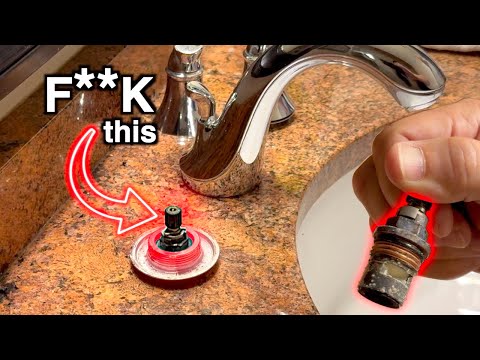
Credit: www.youtube.com
Tips For Maintenance
Maintaining your faucet valve is key to preventing leaks and costly repairs. Simple care steps can extend the valve’s life and keep water flowing smoothly.
Regular Inspections
Check your faucet valve often for signs of wear or leaks. Look under the sink and around the faucet base. A small drip or moisture can signal a problem. Tighten any loose parts gently. Early detection saves time and money on repairs.
Preventing Future Issues
Clean the faucet parts regularly to stop buildup of dirt and minerals. Use mild cleaners and soft cloths to avoid damage. Avoid using excessive force when turning the faucet on or off. Install water softeners if your water is hard. These actions keep valves working well longer.
Frequently Asked Questions
How Do I Know When To Replace A Faucet Valve?
If your faucet leaks, drips, or has low water pressure, the valve might be faulty. Noisy faucets or difficulty turning the handle also indicate valve issues. Replacing the valve can fix these problems and restore proper function.
What Tools Are Needed To Replace A Faucet Valve?
You typically need an adjustable wrench, screwdriver, pliers, and plumber’s tape. A replacement valve matching your faucet model is essential. Having a bucket and towels handy helps manage water spills during the process.
How Long Does It Take To Replace A Faucet Valve?
Replacing a faucet valve usually takes 30 to 60 minutes. The time depends on your skill level and faucet type. Proper preparation and following clear steps can make the process quicker and easier.
Can I Replace A Faucet Valve Without Shutting Off Water?
No, always turn off the main water supply before starting. This prevents leaks and water damage. After shutting off, open the faucet to drain remaining water before replacing the valve.
Conclusion
Replacing a faucet valve can save water and money. It takes some tools and careful steps. Turn off the water before starting. Follow each step slowly to avoid mistakes. Check for leaks after finishing the job. A working valve stops drips and keeps water flow steady.
Simple repairs like this help keep your home in good shape. Give yourself time and work with care. You can do it, even with little experience. Small fixes make a big difference in your daily life.

As the chief content writer, Hassan Al Sarker works as a professional kitchen-based content creator at Kitchen Liker.
In addition to reviewing the content published on Kitchen Liker, he ensures that it is accurate, relevant, and helpful. As a result, all the reviews and information published at Kitchen Liker are neutral and userfriendly.
Hassan Al Sarker has a bachelor’s degree in Hotel and Tourism Management From the Newyork University. Before joining Kitchen Liker, he was a contributor at Kitchen Club, United States.