Imagine walking into your kitchen and being greeted by a sparkling clean environment that smells fresh and natural. This isn’t just a dream; it’s something you can achieve with a homemade kitchen cleaner spray.
Making your own cleaner isn’t just about saving money—it’s about knowing exactly what ingredients are in your cleaning products and ensuring they are safe for your family and the environment. Have you ever been overwhelmed by the harsh chemical scents of store-bought cleaners?
Or worried about their impact on your health and the planet? You’re not alone. By creating your own kitchen cleaner spray, you gain control over your cleaning routine, ensuring it’s both effective and eco-friendly. Dive into this guide and discover how easy it is to make a cleaner that leaves your kitchen spotless and gives you peace of mind.
Credit: www.walmart.com
Benefits Of Diy Kitchen Cleaner
Creating your own kitchen cleaner spray has many advantages. DIY solutions are cost-effective and eco-friendly. They help reduce harmful chemicals in your home. With natural ingredients, you can ensure safety for your family. Plus, the process is simple and rewarding.
Benefits Of Cost Savings
Store-bought cleaners can be expensive. Making your own saves money. You use basic ingredients already at home. These ingredients are cheaper than commercial products. This means more savings for your budget.
Environmental Impact
DIY cleaners are kinder to the planet. They reduce plastic waste from store packaging. Using natural items means fewer pollutants. You contribute to a healthier environment with homemade solutions.
Healthier Ingredients
Commercial cleaners have harsh chemicals. DIY sprays use safe, natural ingredients. Vinegar, baking soda, and lemon are common choices. These are gentler on skin and respiratory systems. They protect your family’s health.
Personalization
DIY cleaners can be customized to your needs. Add essential oils for a pleasant scent. Adjust the formula for specific cleaning tasks. Personalization makes cleaning more enjoyable.
Simple Process
Making a cleaner spray is easy. You mix ingredients and store them in a spray bottle. The process takes just minutes. Anyone can do it, regardless of skill level.
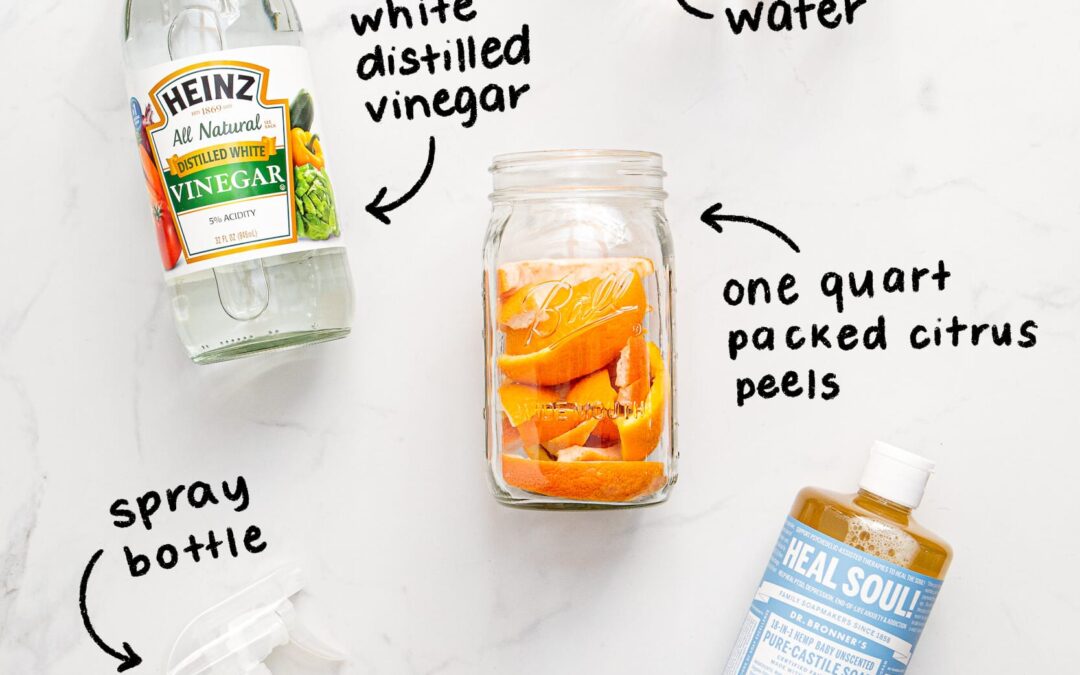
Essential Ingredients
Creating a kitchen cleaner spray is simple with key ingredients like vinegar, water, and essential oils. These natural components help remove stains and odors effectively. A few drops of lemon or tea tree oil add extra freshness and antibacterial properties.
When crafting your kitchen cleaner spray, understanding the essential ingredients is key. These ingredients not only ensure your cleaner is effective but also make it safe for your family and the environment. Let’s dive into the components that make a kitchen cleaner spray truly shine.Natural Cleaning Agents
The foundation of any good cleaner is its cleaning agents. Baking soda and vinegar are household staples that pack a powerful punch against grime. Baking soda acts as a mild abrasive, ideal for scrubbing tough spots. Vinegar, on the other hand, cuts through grease thanks to its acidic nature. Have you ever noticed how a splash of vinegar can make your kitchen surfaces sparkle?Antibacterial Components
Keeping your kitchen germ-free is crucial. Tea tree oil and hydrogen peroxide are excellent choices for their antibacterial properties. A few drops of tea tree oil not only add an extra layer of germ-fighting power but also introduce a natural scent. Hydrogen peroxide is another effective agent, breaking down bacteria without leaving harmful residues. Isn’t it reassuring to know that these simple ingredients can enhance your kitchen’s hygiene?Fragrance Additives
Who doesn’t love a fresh-smelling kitchen? Essential oils like lemon and lavender can transform the atmosphere. Lemon oil not only provides a clean scent but also has additional cleaning properties. Lavender offers a calming aroma, perfect for making your kitchen a pleasant space. Adding these oils can make cleaning a more enjoyable experience. Have you tried experimenting with scents to find your perfect blend? Creating your own kitchen cleaner spray is both rewarding and practical. By choosing the right ingredients, you ensure a cleaner that’s effective, safe, and tailored to your preferences. What will your next cleaning concoction look like?Tools Required
Creating your own kitchen cleaner spray is simple. You only need a few tools. These items are probably already in your home. Having the right tools makes the process easy and quick. Let’s explore what you need.
Measuring Instruments
Accurate measurements are crucial for mixing ingredients. Use measuring cups and spoons. They help in getting the right ratios. This ensures the cleaner works effectively. Don’t guess the amounts. Always measure properly.
Mixing Containers
A mixing container is essential for blending ingredients. Choose a bowl or jar with a lid. The lid helps to shake the mixture well. Glass containers are ideal. They don’t react with ingredients.
Spray Bottles
Once mixed, transfer the cleaner to a spray bottle. Choose bottles with adjustable nozzles. This allows control over the spray pattern. Ensure the bottle is clean before use. This prevents contamination.

Credit: loveleafco.com
Step-by-step Mixing Process
Creating your own kitchen cleaner spray is a rewarding task. You not only gain control over the ingredients but also save money and contribute to a healthier environment. Ready to get your hands a little messy? Let’s dive into the step-by-step mixing process for crafting your perfect kitchen cleaner spray!
Preparing Ingredients
First, gather your ingredients. You’ll need white vinegar, water, and essential oils. White vinegar is a powerful cleaning agent and helps to break down grime.
Essential oils such as lemon or tea tree add a pleasant scent and boost antibacterial properties. Measure equal parts of vinegar and water, say one cup each, to start.
Have you ever noticed how the smell of lemon can brighten up your mood? Choose an essential oil that you love, because you’ll be smelling it every time you clean!
Combining Elements
Now, let’s mix! Pour the vinegar into a spray bottle. Add the water next, ensuring that the two are evenly combined.
Shake the bottle gently to mix them well. This is where the magic begins. Your mixture is nearly complete.
Drop in about 10-15 drops of your chosen essential oil. This is your chance to experiment. Feel free to adjust the number of drops depending on your scent preference.
Final Adjustments
With your ingredients combined, it’s time for final tweaks. Test your spray on a small area to ensure it cleans effectively without leaving residue.
Does it smell too strong or too weak? Simply add more essential oil or dilute with water to adjust. Remember, you want a cleaner that not only works but is enjoyable to use.
Consider this: How does it feel to have a cleaner that you customized yourself? You might find that cleaning becomes a more satisfying task.
Don’t forget to label your spray bottle. This prevents accidental misuse and keeps your kitchen organized. Now you’re ready to conquer kitchen messes with your homemade spray!
Safety Tips
Craft a safer kitchen cleaner spray using natural ingredients. Mix vinegar, water, and essential oils in a spray bottle. Ensure proper ventilation during use to prevent inhaling fumes.
Cleaning your kitchen can be a rewarding task, especially when you make your own kitchen cleaner spray. However, it’s crucial to prioritize safety while handling and storing your homemade cleaner. Taking the right precautions ensures that your cleaning process is both effective and risk-free. Below are some essential safety tips to keep in mind as you embark on your cleaning journey.Handling Precautions
When preparing your cleaner, always wear gloves. This simple step can protect your skin from irritation caused by strong ingredients like vinegar or essential oils. Ensure your workspace is well-ventilated. Open a window or turn on a fan to avoid inhaling any fumes that might be released during mixing. Accidentally mixed the wrong ingredients? Never panic. Instead, consult a reliable source to determine the best course of action. Being prepared for mishaps keeps you safe and calm.Storage Recommendations
Store your cleaner in a clearly labeled spray bottle. A visible label helps everyone in your home know what’s inside and prevents accidental misuse. Keep the bottle away from direct sunlight. Prolonged exposure to sunlight can degrade the ingredients, reducing their effectiveness. Remember to place the cleaner out of reach of children and pets. You’d be surprised how curious little ones can be, and it’s better to be safe than sorry. Have you ever wondered if your cleaner stays effective over time? Consider making small batches. This not only ensures freshness but also allows you to tweak the formula as needed. By focusing on safety, you can enjoy the satisfaction of a sparkling kitchen without any stress. What other safety tips would you add to your cleaning routine?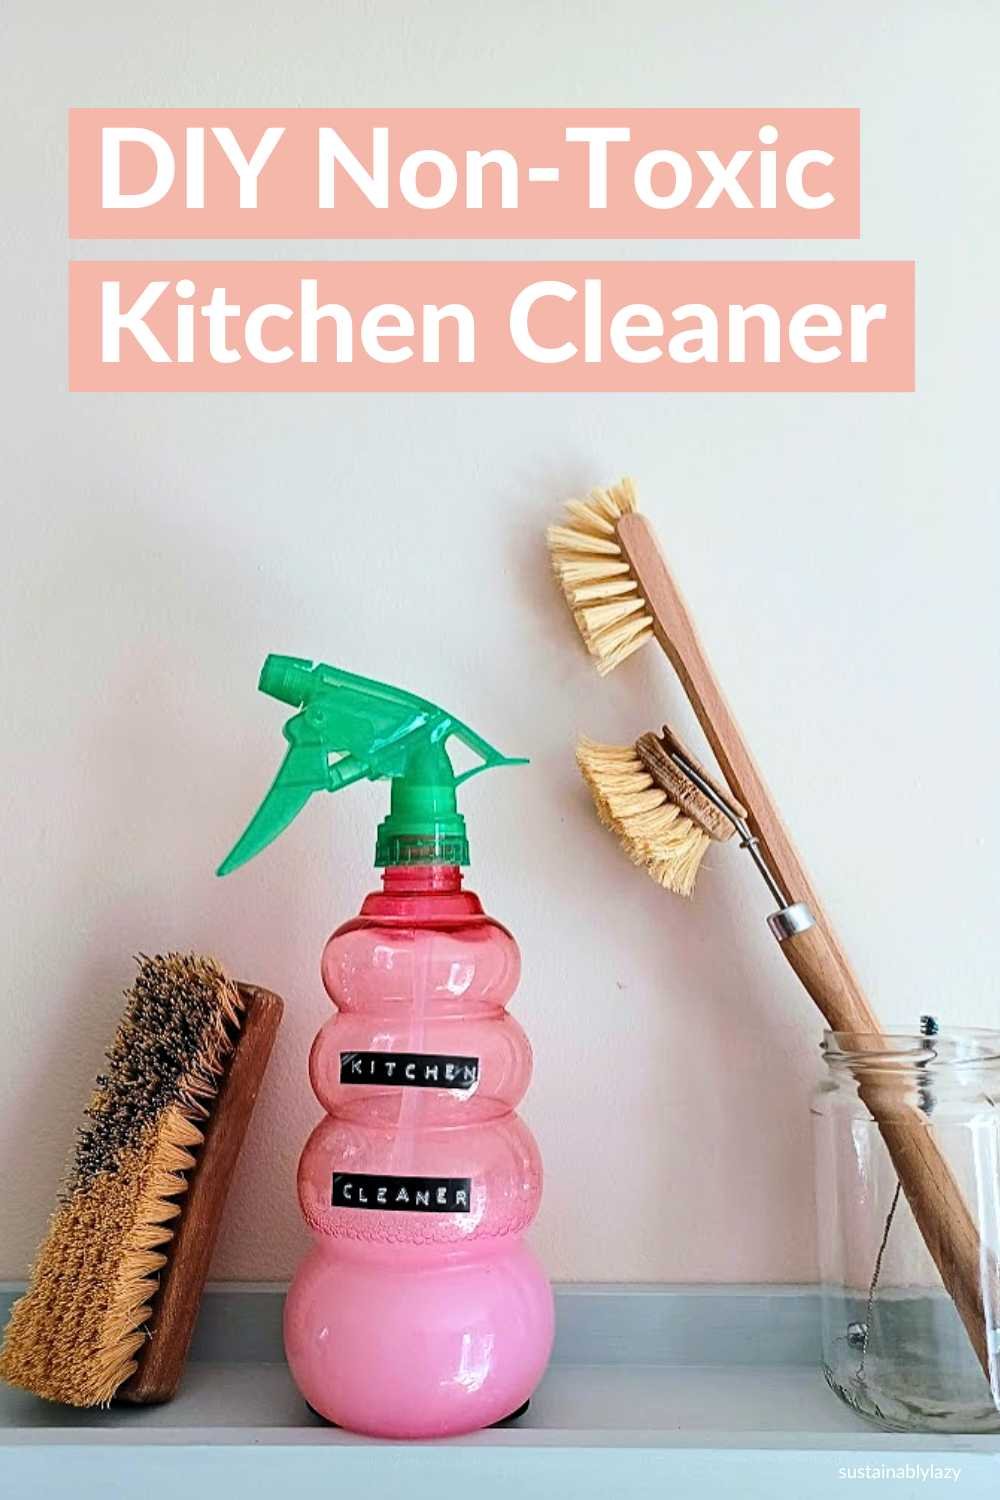
Credit: www.sustainablylazy.com
Eco-friendly Practices
Eco-friendly practices are gaining popularity in households today. Making your own kitchen cleaner spray is a great way to start. It’s not only easy but also sustainable. By using natural ingredients, you reduce your carbon footprint. Let’s explore some eco-friendly practices for making kitchen cleaner spray.
Choosing Sustainable Ingredients
Opt for ingredients that are kind to the earth. Vinegar is a great choice. It’s natural and effective for cleaning. Baking soda is another sustainable option. It removes stains and odors. Essential oils add fragrance without chemicals. Lemon oil is fresh and antibacterial. These ingredients are safe for you and the planet.
Reducing Waste
Reducing waste is crucial in eco-friendly cleaning. Reuse old spray bottles for your cleaner. This helps avoid plastic waste. Measure ingredients carefully to minimize leftovers. Store unused cleaner in glass jars. Glass is recyclable and safe. Use a cloth rag instead of paper towels. Cloths are reusable and reduce trash. Simple changes make a big impact.
Troubleshooting Common Issues
Making kitchen cleaner spray at home is rewarding. Sometimes, issues arise. Don’t worry. Most problems have simple fixes. This guide helps with common issues. Enjoy cleaner surfaces with less stress.
Dealing With Residue
Leftover residue can be frustrating. It often happens with homemade cleaners. Check the ingredients. Some mixtures cause residue. Adjust the recipe slightly. Use less soap or vinegar. Test on a small area first. Wipe surfaces with a damp cloth. This removes any leftover film. Try using distilled water. Tap water sometimes leaves minerals behind.
Improving Scent
Unpleasant scents can occur. Essential oils solve this problem. Add a few drops for fragrance. Lemon, lavender, or peppermint work well. Stir the mixture gently. Don’t overpower the cleaner. Test for allergies first. Use fresh ingredients. Old oils lose their scent. Store the cleaner in a cool, dark place.
Customizing Your Cleaner
Crafting your own kitchen cleaner spray can be simple and satisfying. Combine vinegar, water, and essential oils in a spray bottle. This natural blend effectively tackles grease and grime, leaving your kitchen fresh.
Creating your own kitchen cleaner spray allows you to tailor it to your specific needs. This not only ensures effectiveness but also gives you the freedom to personalize it. Imagine a cleaner that not only makes your surfaces sparkle but also fills your kitchen with your favorite scent.Adjusting For Different Surfaces
Different surfaces in your kitchen require different care. You wouldn’t want to use the same cleaner on your granite countertop as you would on your wooden table. For granite, you might want to avoid acidic ingredients like vinegar, which can damage the sealant. Consider using a mixture of mild dish soap and warm water for sensitive surfaces. For tougher jobs on stainless steel, a combination of white vinegar and water works wonders. Always test a small area first to ensure your cleaner is safe for the surface.Personalizing Scents
Why settle for the standard lemon or lavender when you can create a scent that’s uniquely yours? Essential oils are a great way to customize the fragrance of your cleaner. Try combining peppermint and eucalyptus for a refreshing aroma that energizes you while you clean. Or, if you prefer something more calming, a blend of lavender and chamomile might be perfect. Remember to add just a few drops—essential oils are potent and a little goes a long way. Do you have a scent that reminds you of a special place or moment? Adding it to your cleaner can transform an ordinary chore into a delightful experience. Make cleaning time something you look forward to with your personalized scent. Customizing your cleaner not only makes it more effective but turns a simple task into something enjoyable. What’s your favorite scent combination for cleaning?Frequently Asked Questions
What Ingredients Are Needed For Homemade Kitchen Spray?
To make a kitchen cleaner spray, you’ll need water, vinegar, essential oils, and dish soap. Vinegar acts as a natural disinfectant. Essential oils add fragrance and additional antibacterial properties. Dish soap helps to break down grease and grime effectively. This combination ensures a powerful yet non-toxic cleaning solution.
How Do I Mix Kitchen Cleaner Spray?
Start by combining one cup of water with one cup of vinegar. Add a few drops of essential oil and a teaspoon of dish soap. Mix well in a spray bottle. Shake before each use to ensure ingredients are properly mixed.
This straightforward method creates an efficient and safe cleaning spray.
Is Homemade Kitchen Spray Safe On All Surfaces?
Homemade kitchen cleaner spray is generally safe for most surfaces. However, avoid using it on natural stone like granite or marble. Vinegar can etch and damage these surfaces over time. Always test a small area first to ensure compatibility. This precaution ensures the safety and longevity of your kitchen surfaces.
Can Kitchen Spray Remove Tough Stains?
Yes, kitchen cleaner spray can tackle tough stains effectively. The vinegar and dish soap combination works to break down stubborn grime and grease. For best results, spray the solution directly onto the stain. Let it sit for a few minutes before wiping clean.
Repeat the process for persistent stains.
Conclusion
Creating your own kitchen cleaner spray is simple and effective. You control the ingredients, ensuring safety and eco-friendliness. Homemade cleaners save money and reduce waste. They offer a natural way to keep your kitchen sparkling clean. Mix everyday items like vinegar and lemon for powerful results.
Experiment with essential oils for a pleasant scent. Share your favorite recipe with friends. Enjoy a clean kitchen with less effort and cost. It’s practical, easy, and satisfying. Start today, and make cleaning part of your healthy living routine. Your kitchen deserves the best care.
Happy cleaning!

As the chief content writer, Hassan Al Sarker works as a professional kitchen-based content creator at Kitchen Liker.
In addition to reviewing the content published on Kitchen Liker, he ensures that it is accurate, relevant, and helpful. As a result, all the reviews and information published at Kitchen Liker are neutral and userfriendly.
Hassan Al Sarker has a bachelor’s degree in Hotel and Tourism Management From the Newyork University. Before joining Kitchen Liker, he was a contributor at Kitchen Club, United States.